Part III - Adding custom data
What we’ll cover:
- uploading a tileset
- exercise - upload data
- managing data
- using access tokens for managing styles and apps
Uploading a tileset
Uploading custom data to Mapbox Studio will convert the data file into vector tiles. Vector tiles can be used in any Mapbox Studio style and filtered or styled as is into your map. There are multiple ways to upload files to your Mapbox account:
- Directly in Mapbox Studio style editor
- On the Home and Data pages in Mapbox Studio
- Through Mapbox Studio Classic source mode
- Through the Mapbox Uploads API
Accepted data types
You can upload the following data types to your Mapbox account:
When a vector data file is uploaded to Mapbox, it is converted to vector tile format. When a raster data file (like an image) is uploaded to Mapbox, it becomes a set of tiled PNGs. When uploading through Mapbox Studio Classic source mode, you can manually determine maximum and minimum zoom levels for the tileset; for all other upload methods, maximum and minimum zoom levels are determined based on the data.
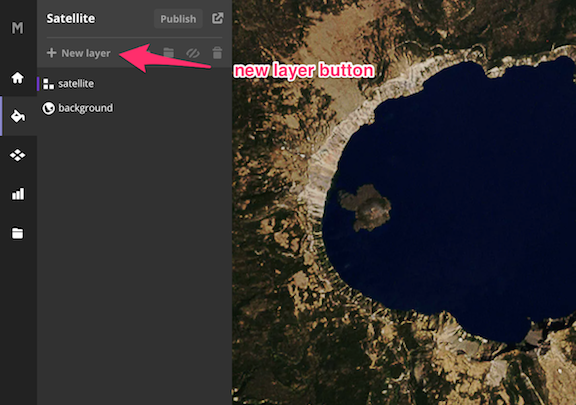
Upload data as a new layer
In Mapbox Studio style editor, click New layer on the top left.
Next, click Select a tileset and you will see an Upload data button and a list of the vector and raster tile tilesets in your Mapbox account. Click Upload data and navigate to your tileset on your local machine.
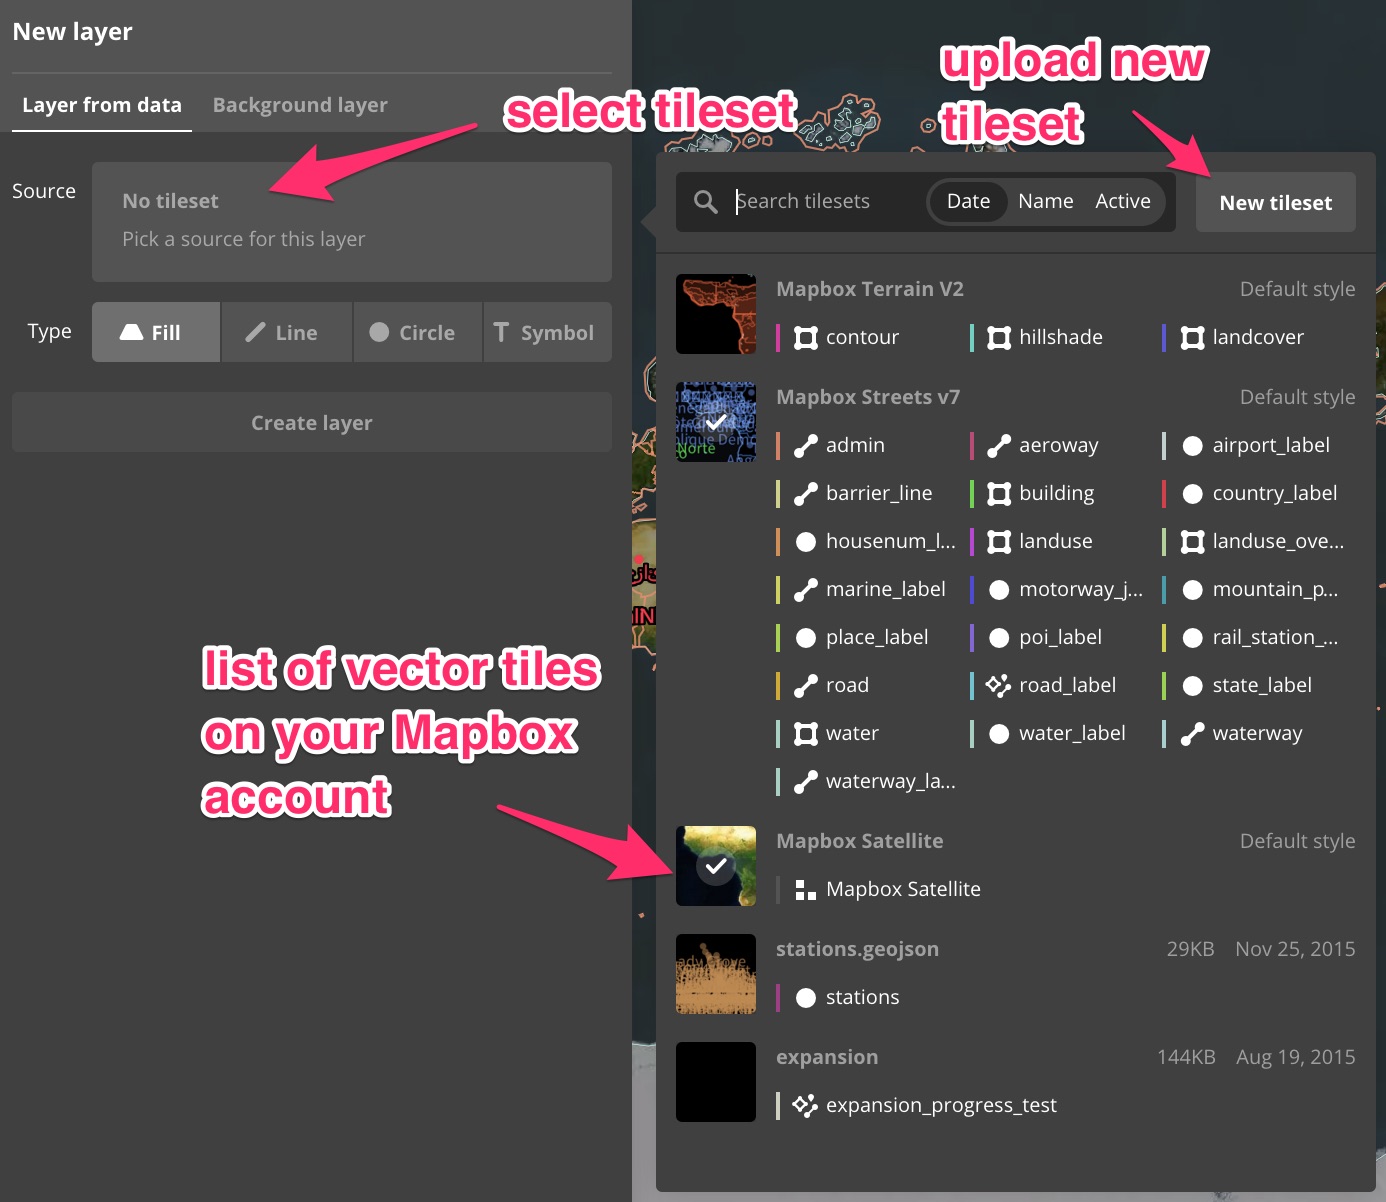
From here, you can continue by setting data filters and adding style rules to the layer.
Upload data from your Tilesets page
On your Tilesets page, click New tileset at the top and navigate to your tileset on your local machine.
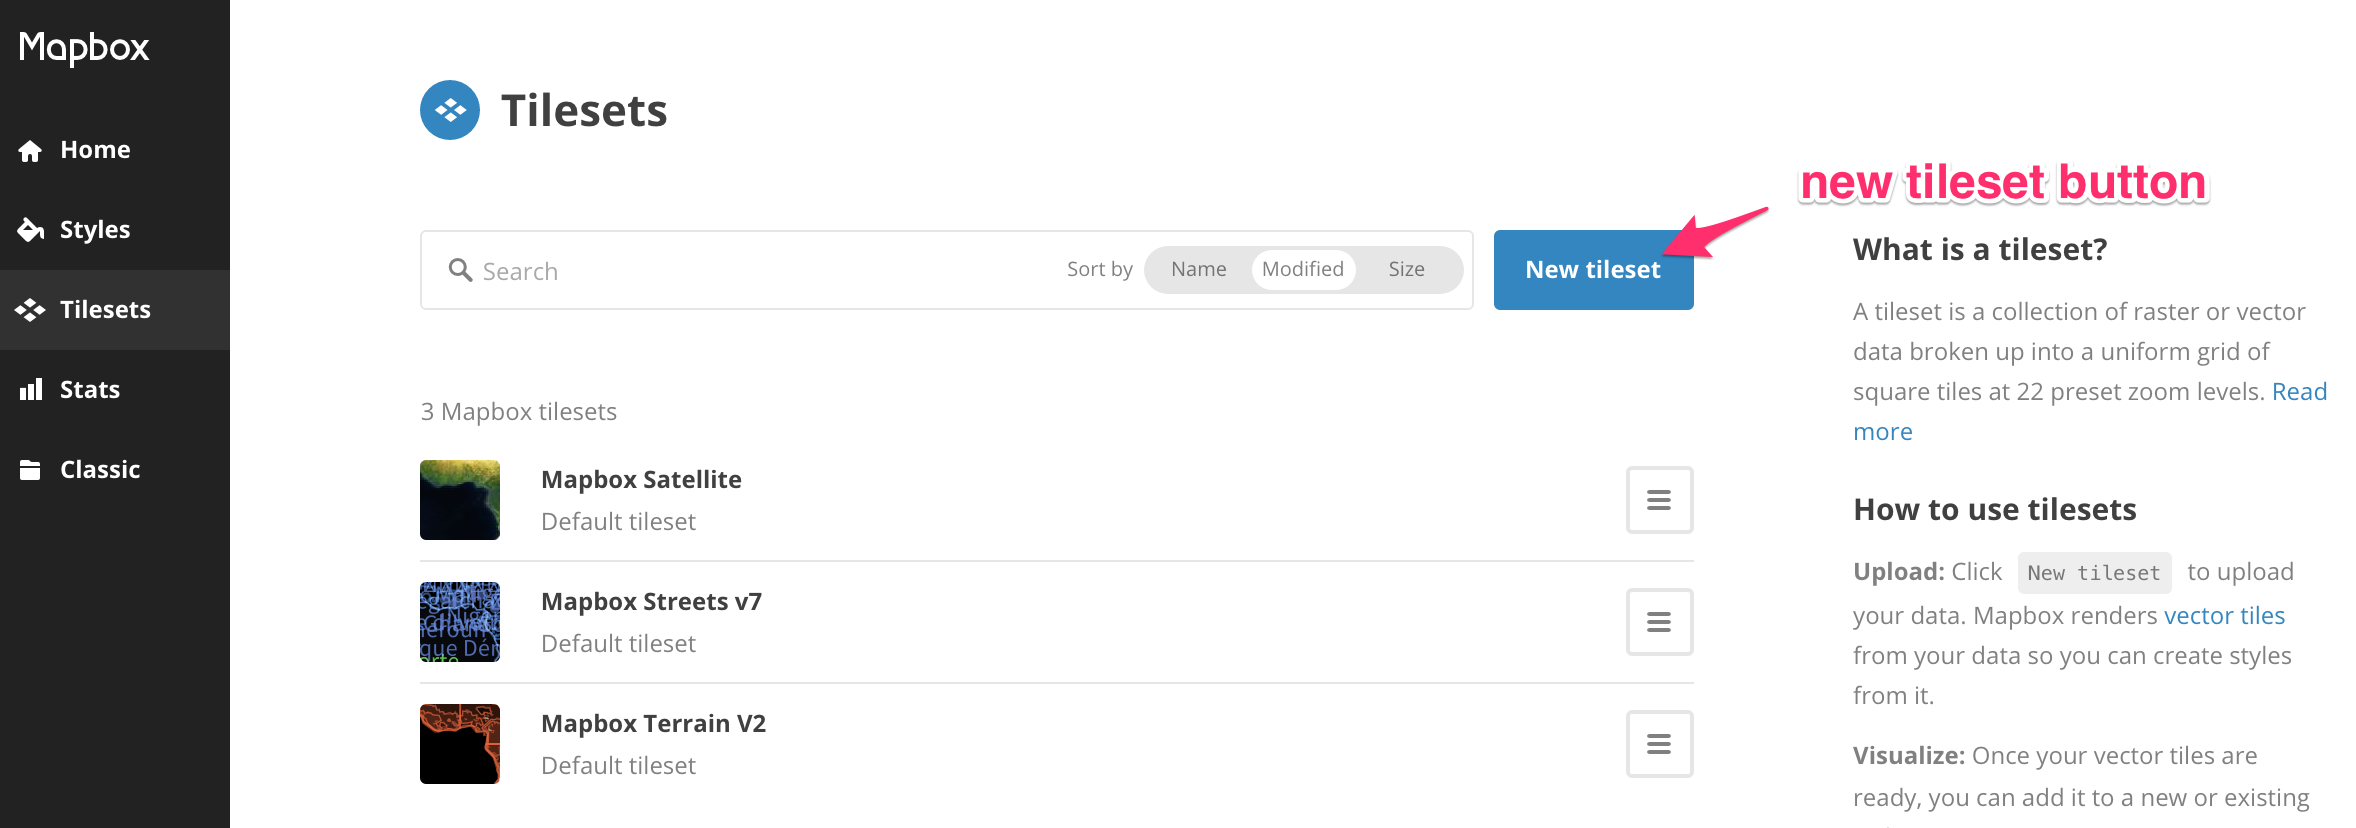
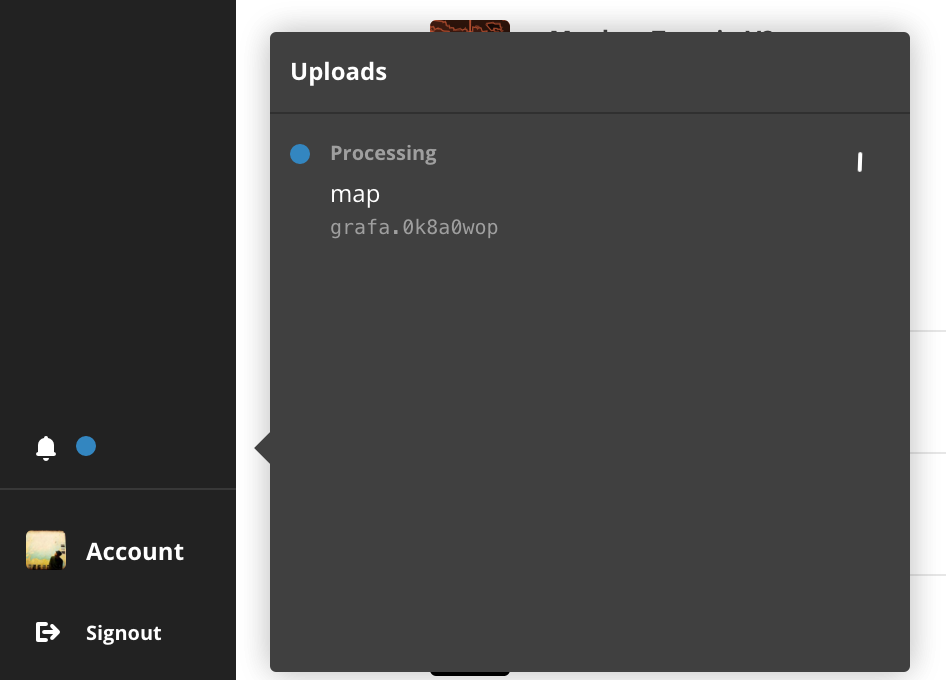
Once you Select a tileset and press the Upload button, the process will begin and an uploads pane will appear in the lower left corner of the page. This pane shows the status of your upload, you will see your map ID, with a blue dot as the file is Processing.
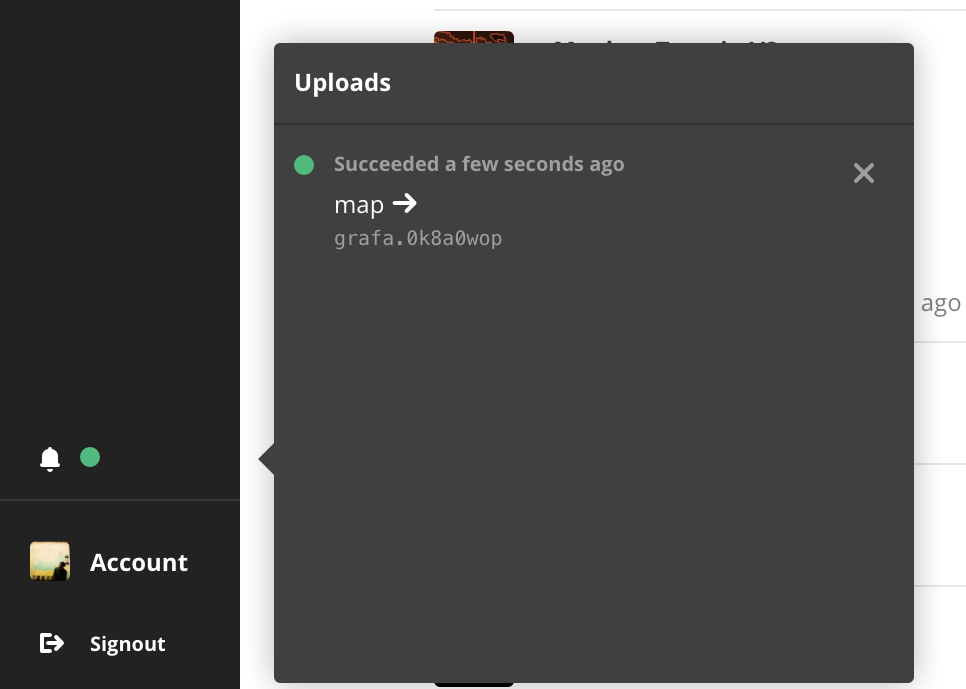
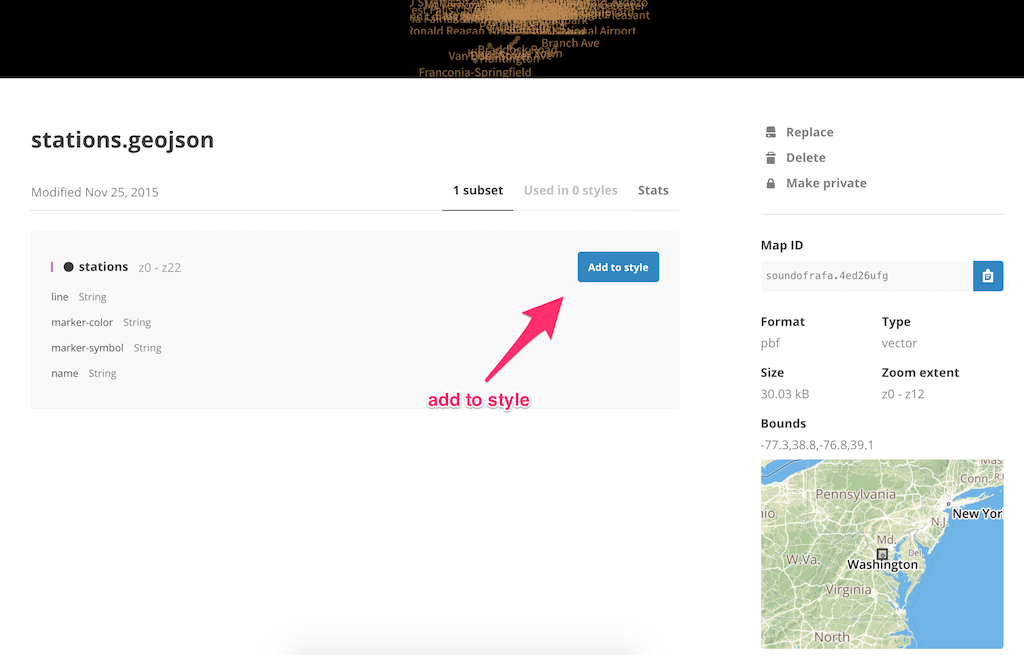
Once the file has successfully uploaded, the circle will turn green with the message Succeeded. Click the map ID to view the details of your tileset on a new page.
From this page, you can add the tileset to any style.
For more information about uploading data to your Mapbox account, see the Uploads page.
Exercise: Upload data
For this exercise, we’re going to download the following data from the data.seattle.gov and then upload it to your account. Download the data here:
Follow these next steps to follow along:
- go to your Tilesets page and drag and drop
Seattle_Traffic_Cameras.csvfile to the page. - depending on your connection, your file should upload within minutes.
- add the new tileset to your Existing style from Part II.
- once the editor has started, Studio will ask to create a new layer
- confirm it’s being added with the type point
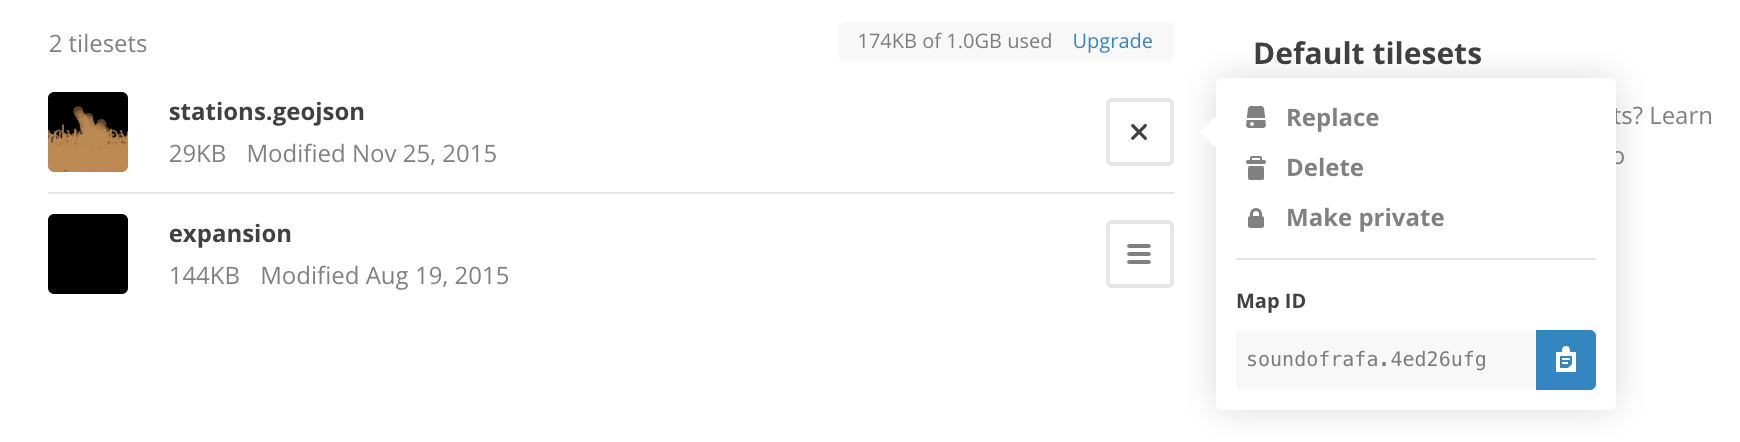
Managing data
You can manage your data in a number of ways:
- replace
- delete
- make private
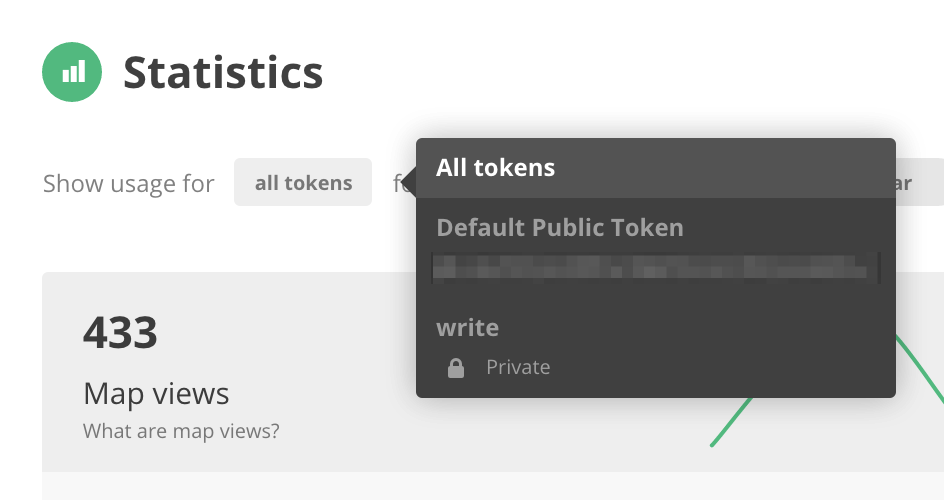
Access tokens
- creating tokens
- rotating tokens
- scopes